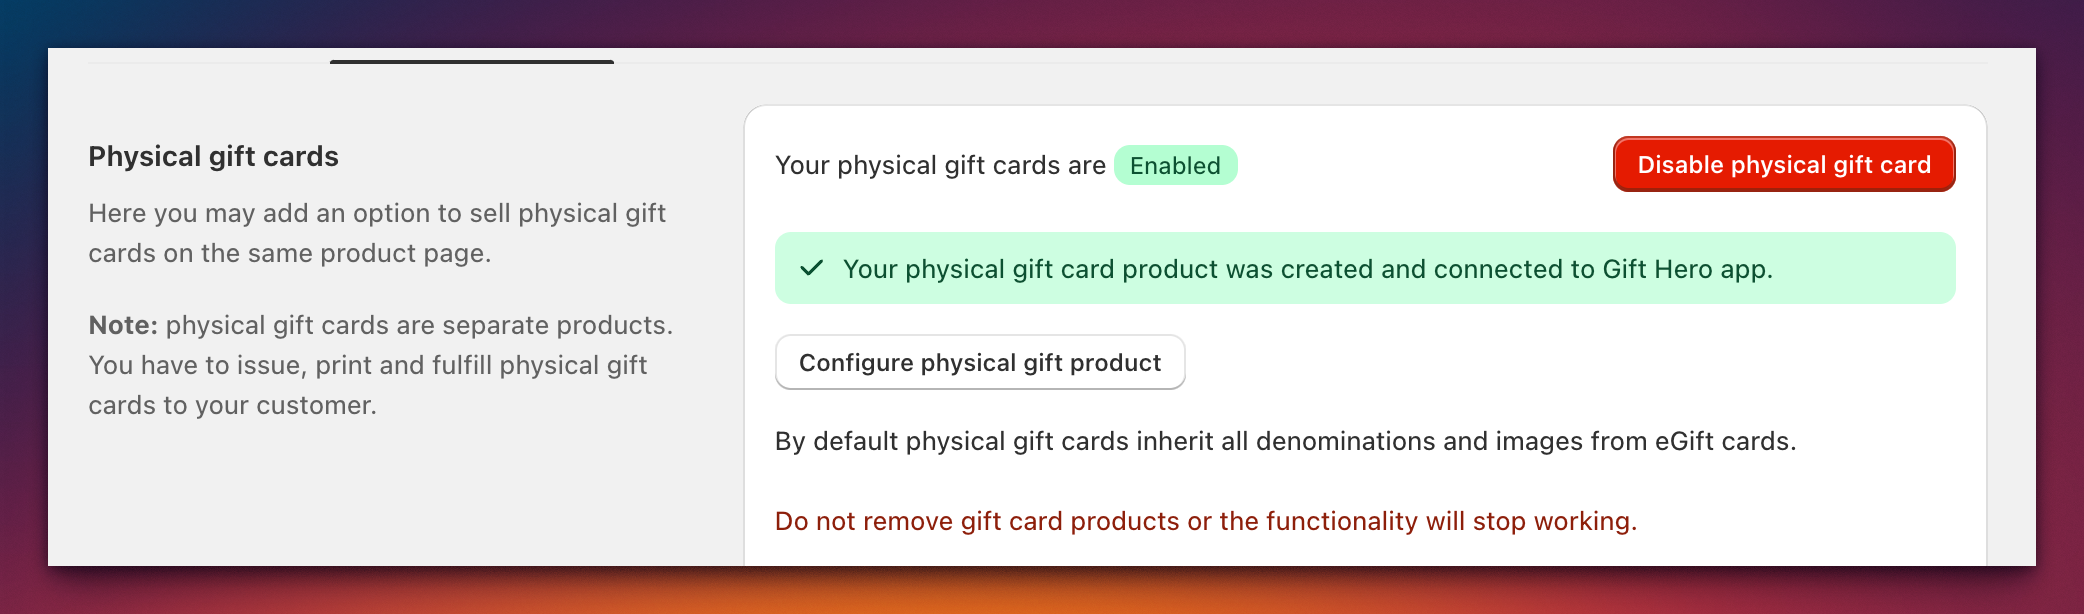
Physical Gift Cards
Physical gift cards are printed cards you sell at the register or ship with online orders. Each card carries a code. GiftCard Hero turns that code into a regular Shopify gift card: either when the card is sold (the balance is the amount the customer paid), or up front, when you import codes together with their balances.
Two ways to bring printed codes into GiftCard Hero
| Activate on sale | Pre-loaded | |
|---|---|---|
| Where | eGift/Physical cards → Physical gift cards tab → Gift codes → Upload codes | Bulk actions → Import from file |
| What you upload | The codes only | A CSV with a code and an initial_value on each row |
| When the Shopify gift card is created | When the card is sold: an order is placed, or staff register the card at POS | Right away, with the balance from the file |
| Best for | Cards sold as a product, where the balance is the amount paid | Cards that must hold value before they are sold, such as codes moved from a previous system or promotional cards |
With Activate on sale, an unsold card is only a printed code: it can't be spent until it is sold and assigned. A pre-loaded card can be spent as soon as the import finishes, so keep that stock as secure as cash.
Where the codes come from
- Shopify's printed cards. You can order cards from Shopify Customizable Gift Cards.
- Your own printer. Generate the codes in GiftCard Hero and send them to any printing company (see below).
- Codes you already have, from a card manufacturer or a previous gift card system.
Code format: 8 to 20 letters and numbers. Shopify gift card codes are not case-sensitive, and GiftCard Hero ignores spaces and dashes when you upload or import codes, so ABCD-1234-EFGH-5678 and abcd1234efgh5678 are the same code.
Generating codes for a printing company
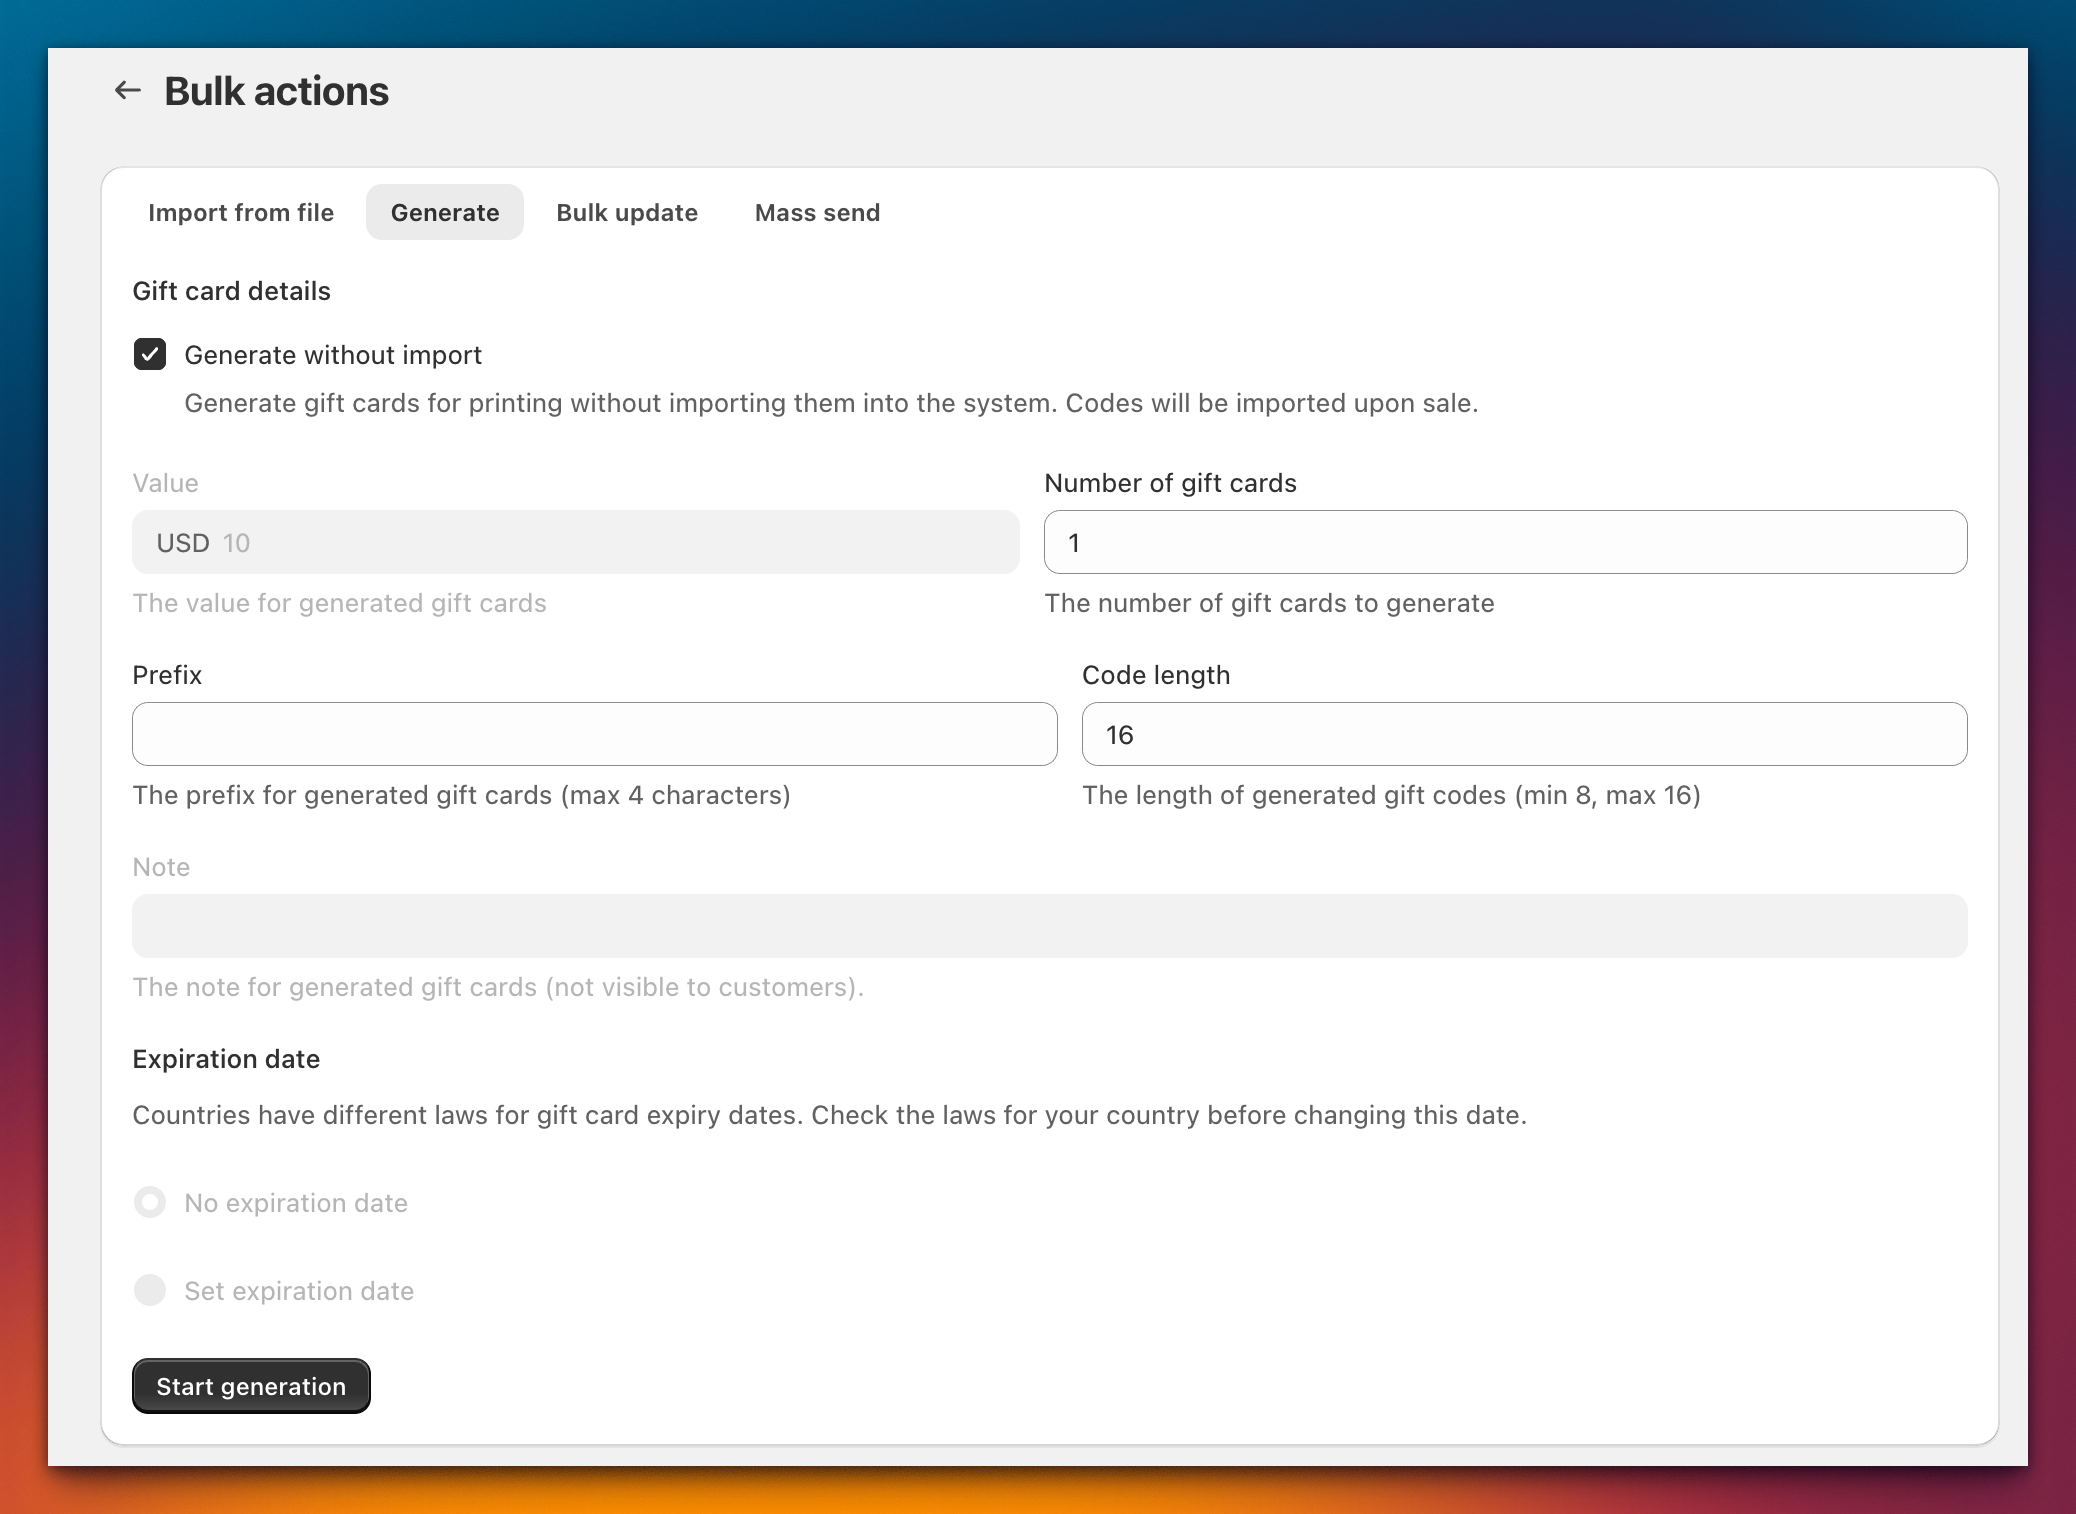
- In GiftCard Hero, go to Bulk actions → Generate.
- Check Generate without import. The codes are generated for printing only: no Shopify gift cards are created, so nothing can be spent yet.
- Set Number of gift cards (up to 100,000 per job), an optional Prefix (up to 4 characters) and Code length (8 to 16; batches over 10,000 cards use at least 14 characters so codes don't collide).
- Click Start generation. When the job appears in the list, open its Results page and click Download results (csv). Next to each code, the
qr_identifiercolumn holds the text to encode in the card's QR code, so it can be scanned at POS.
Give the CSV to your printing company. When the printed cards arrive, bring the codes into GiftCard Hero with Upload codes (activate on sale), or register each card as it is sold (see below).
Activate on sale
Uploading codes
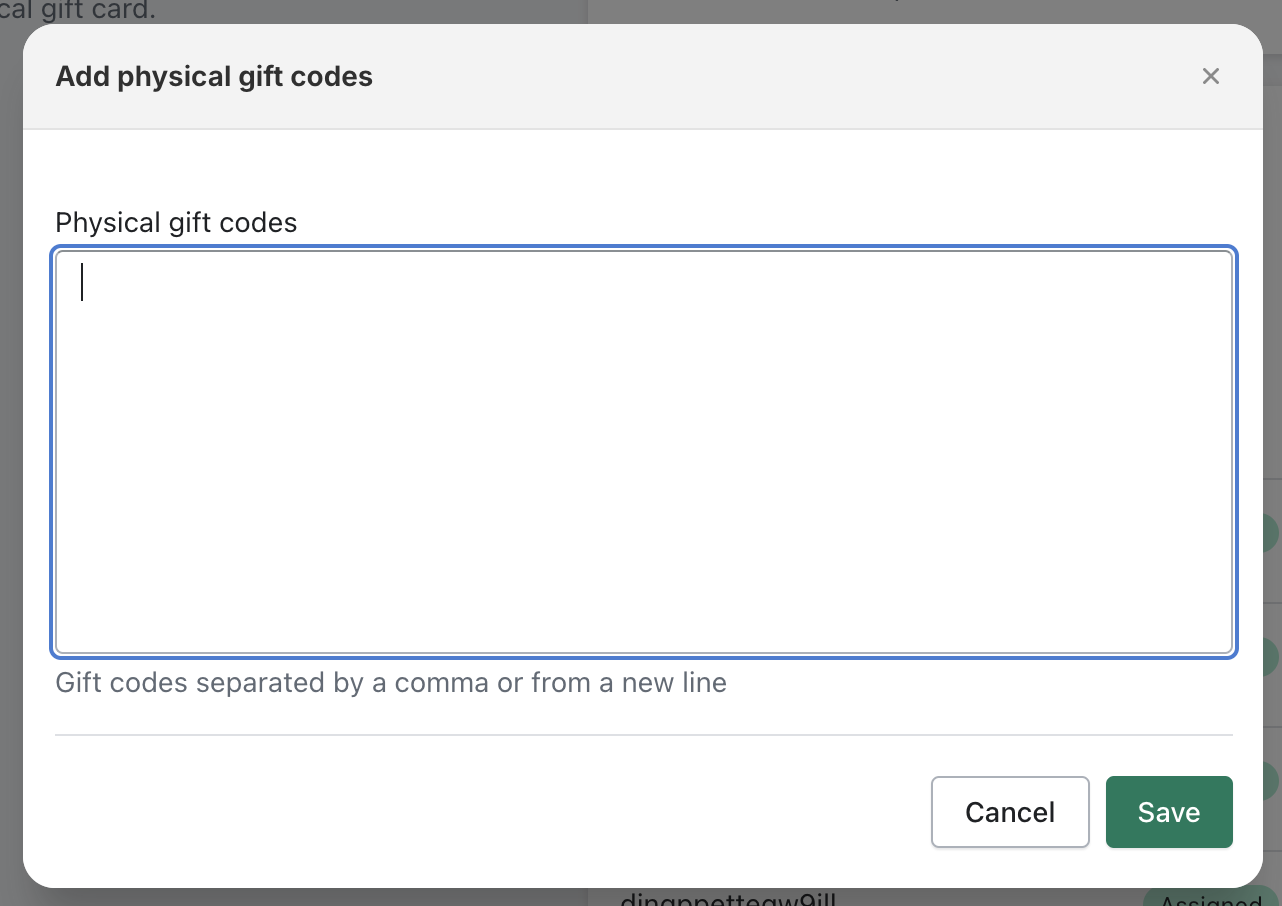
- Go to eGift/Physical cards → Physical gift cards tab.
- In the Gift codes section, click Upload codes.
- If you sell more than one physical gift card product, choose the Physical gift card product the codes belong to.
- Paste the codes, one per line or separated by commas.
- Click Save.
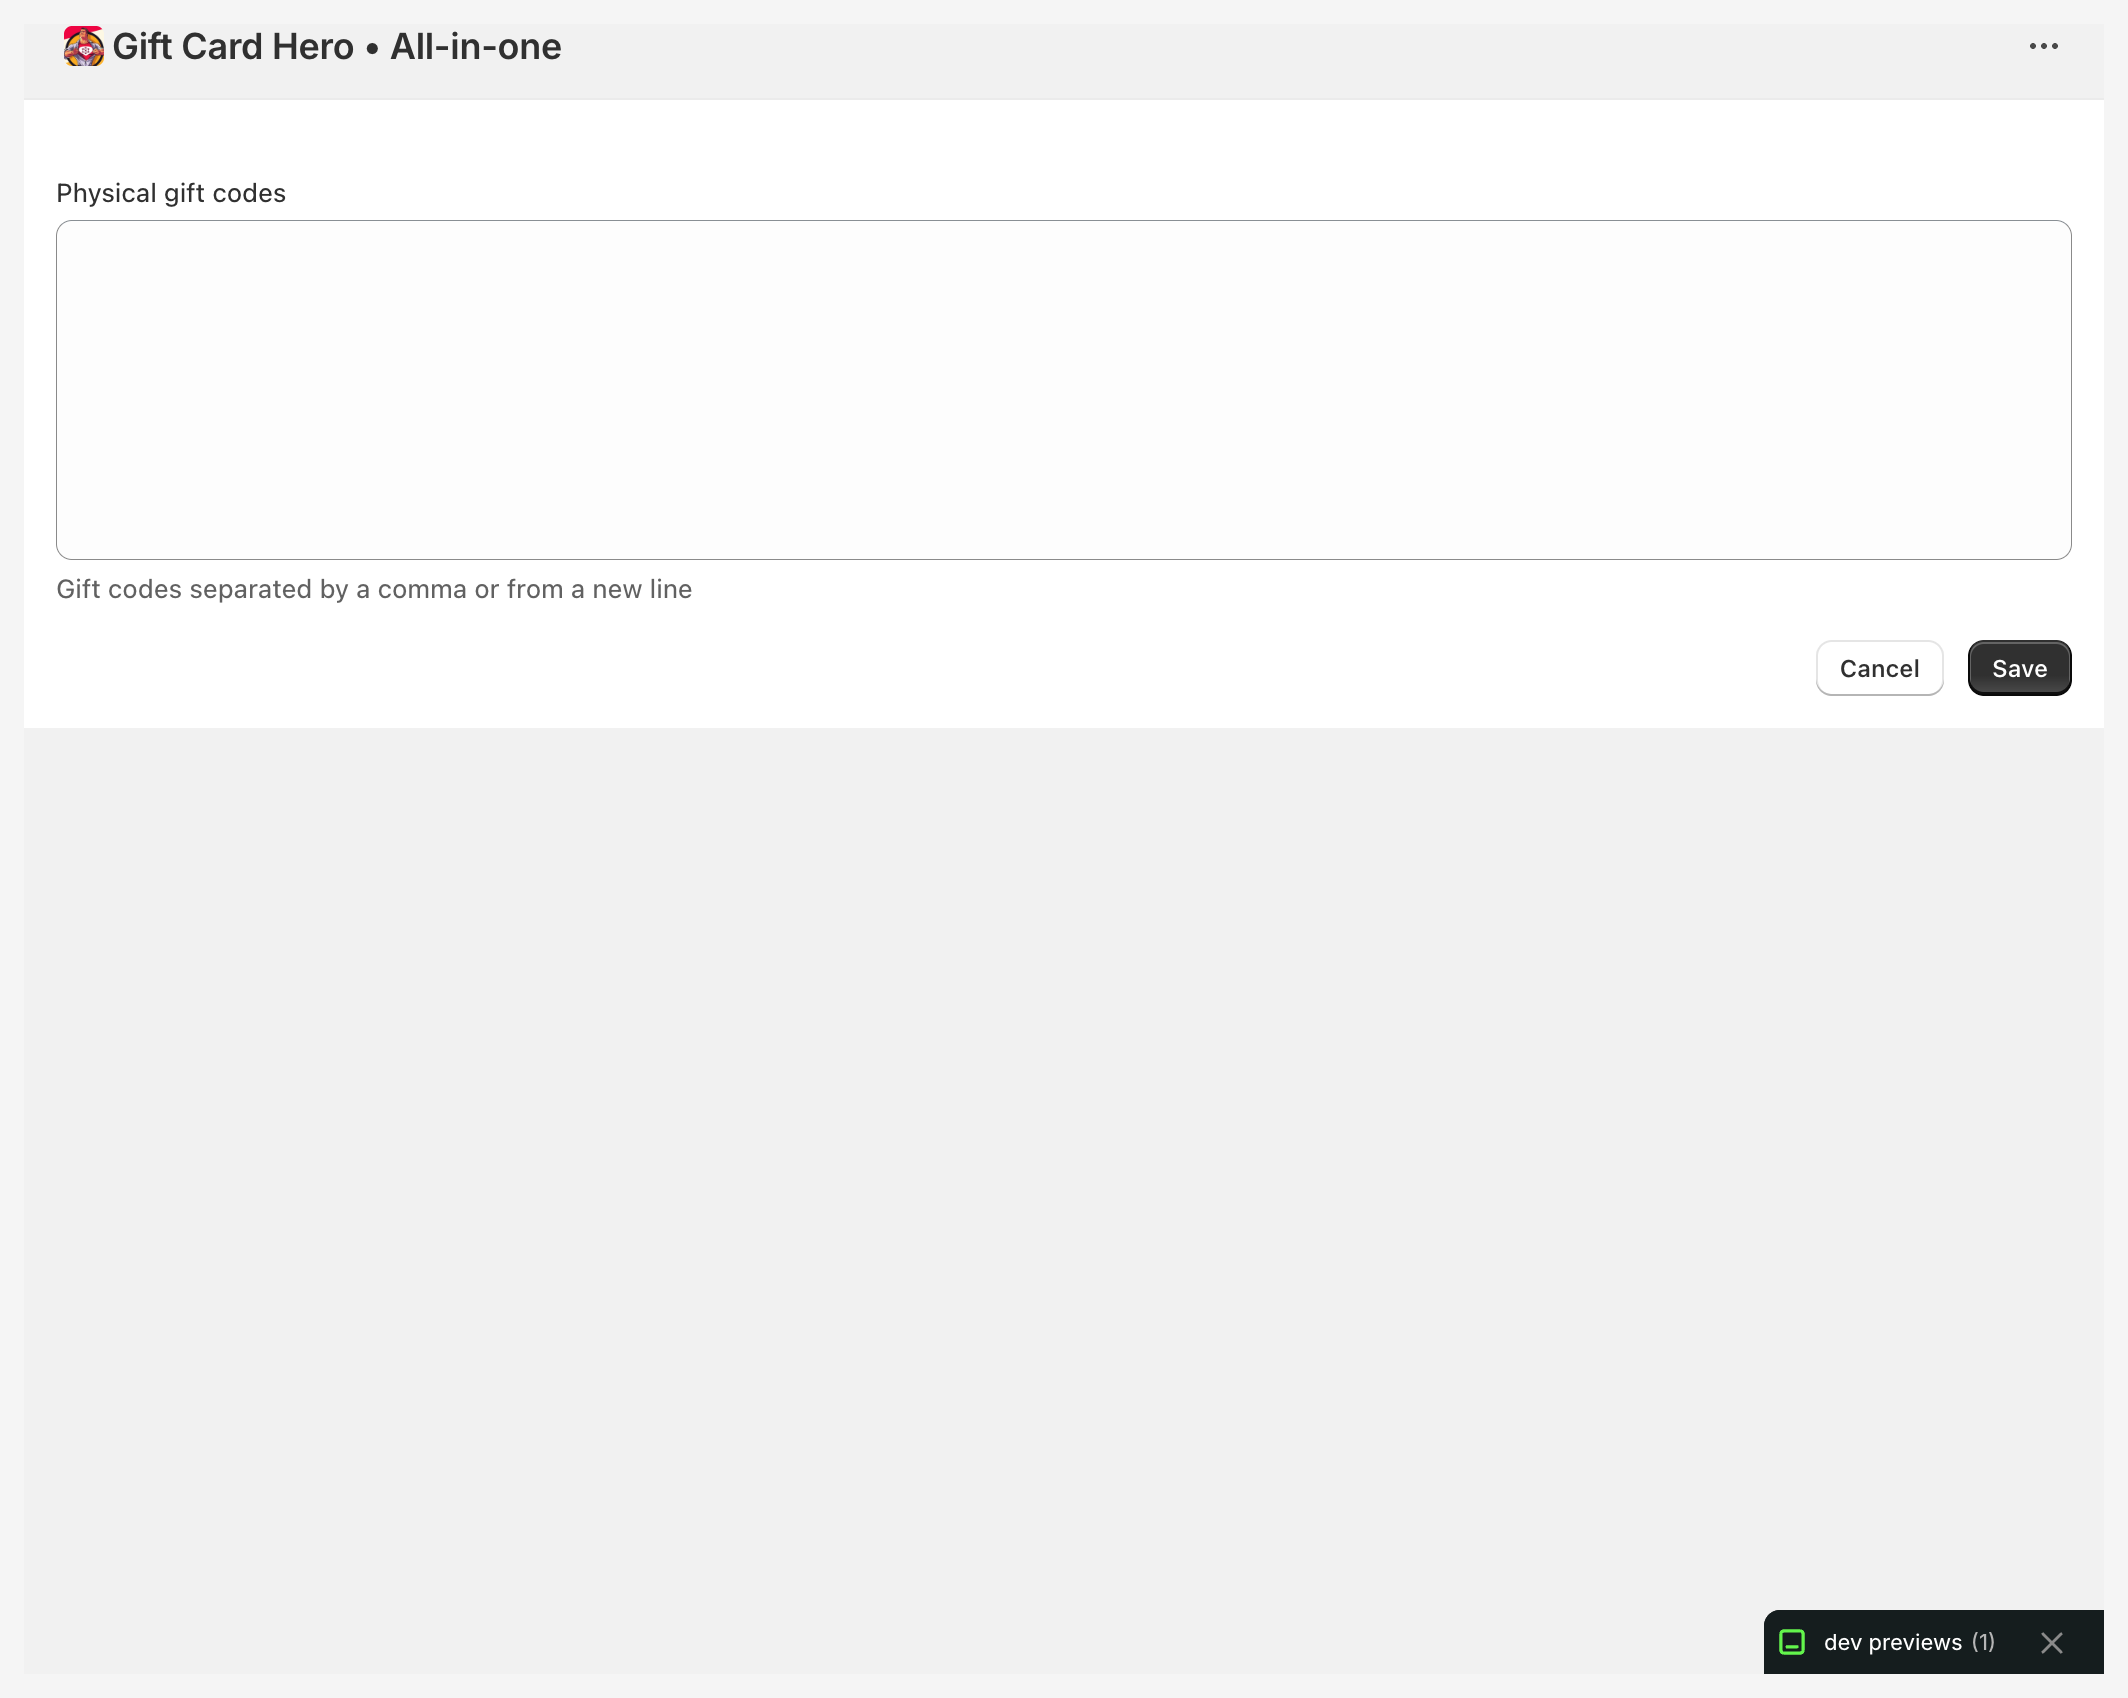
Codes that are already in the pool are skipped. Codes in the wrong format, and codes that already exist as Shopify gift cards, are saved with an error so you can see and remove them.
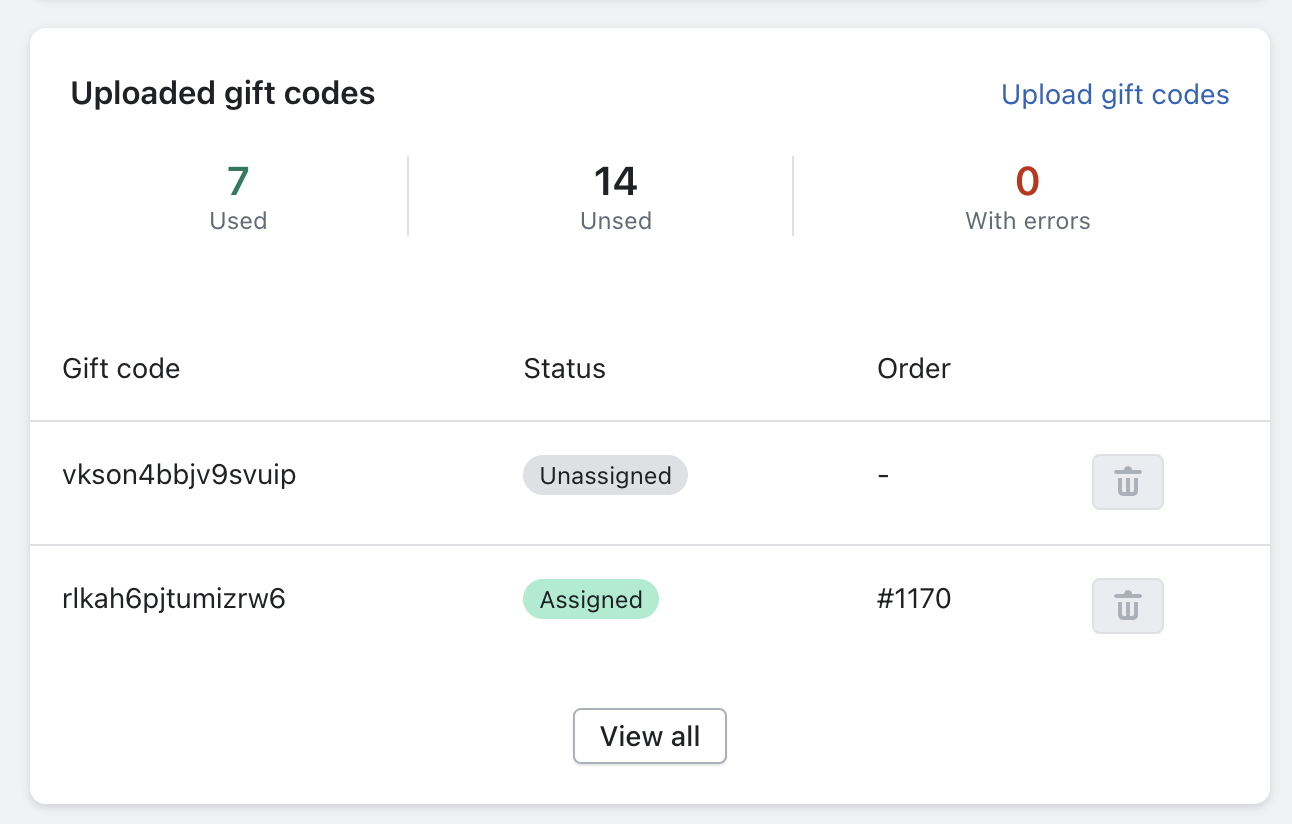
The Uploaded gift codes list shows each code's status:
- Assigned: connected to an order
- Unused: still available in the pool
- With errors: the upload or the assignment failed
Auto assignment
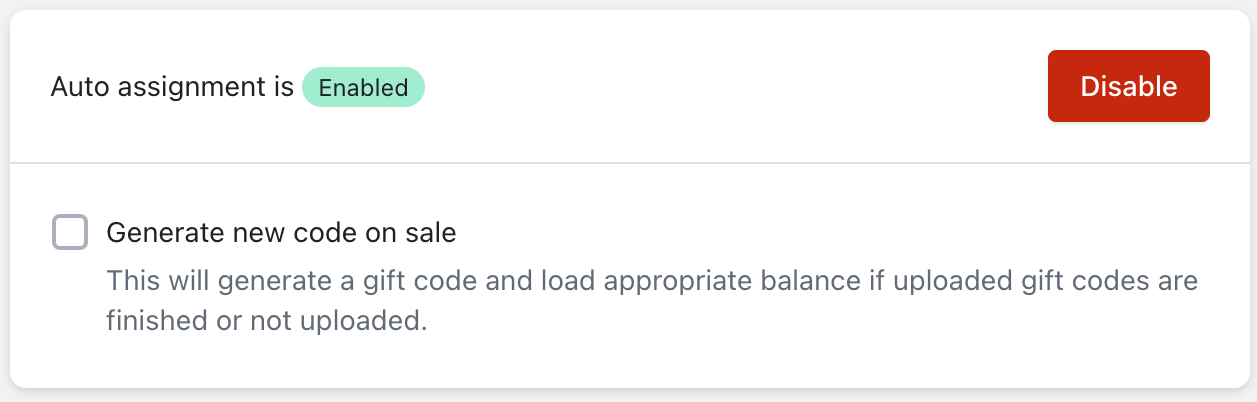
Turn on Auto assignment in the Gift codes section. When an order with a physical gift card is placed, GiftCard Hero takes an unused code from the pool, creates the Shopify gift card with the amount paid and connects it to the order. The assigned code appears in the GiftCard Hero block on the order page, so staff know which card to pack.
Generate new code on sale: when the pool is empty (or you never uploaded codes), GiftCard Hero generates a new code and loads the balance instead. Use it when staff write codes on blank cards; it is not suitable for pre-printed cards, because the generated code won't match any printed card. Gift code length sets the length of these generated codes (default 16).
Manual assignment on the order page
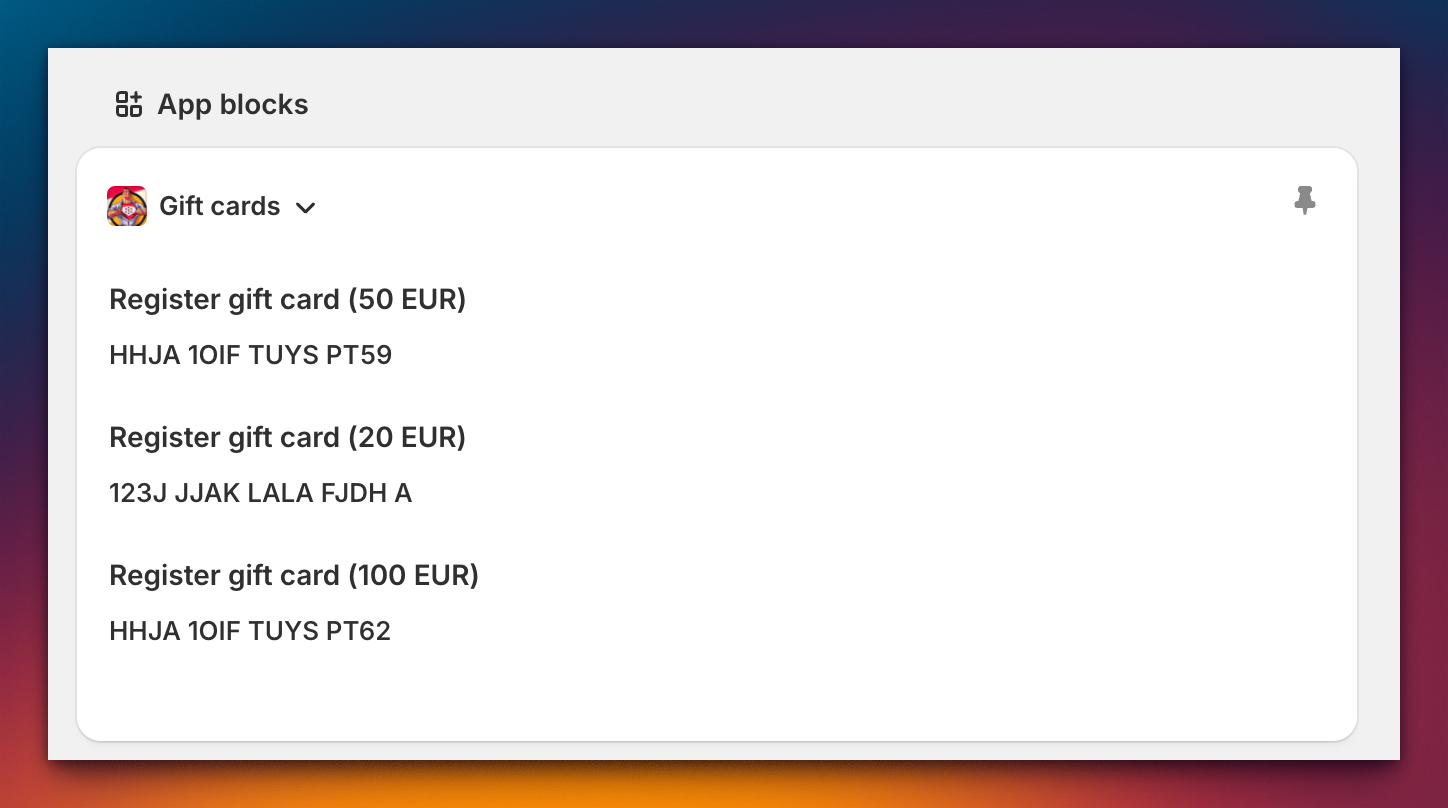
To pick the exact card yourself, register it from the order:
- Navigate to Admin → Orders → find the order with a physical gift card
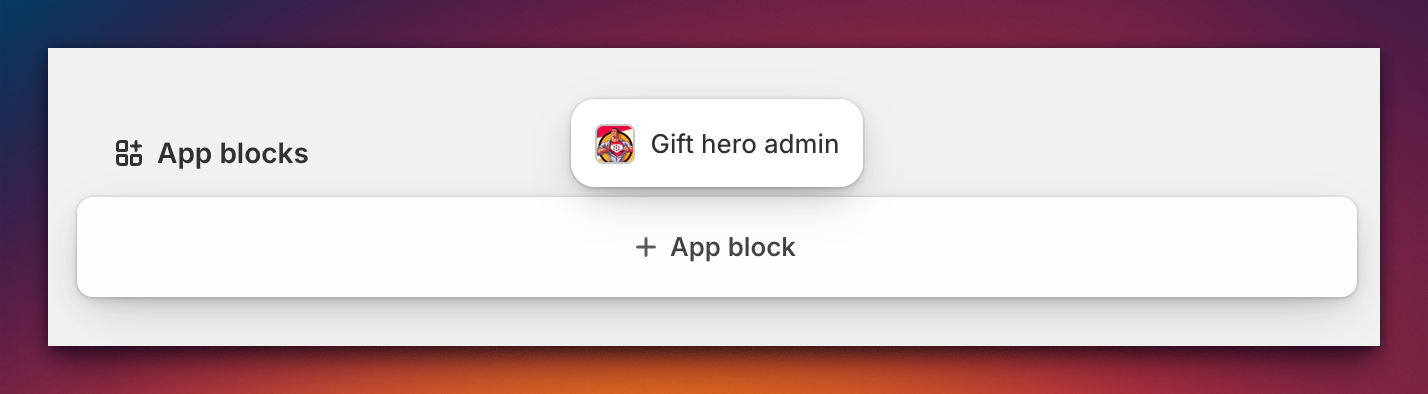
- Scroll to App blocks → click + App block
- Select Gift Card Hero Admin
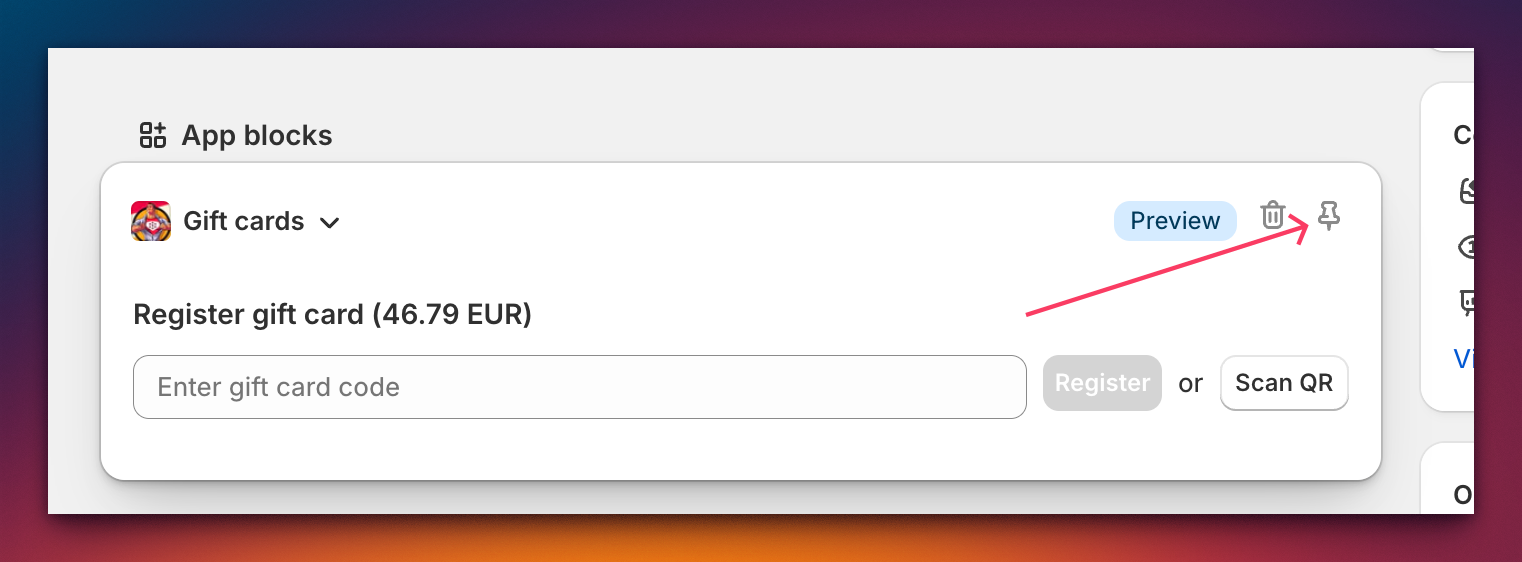
- Pin the extension for easy future access
- Enter the code from the printed card, or scan its QR code
Scanning QR codes
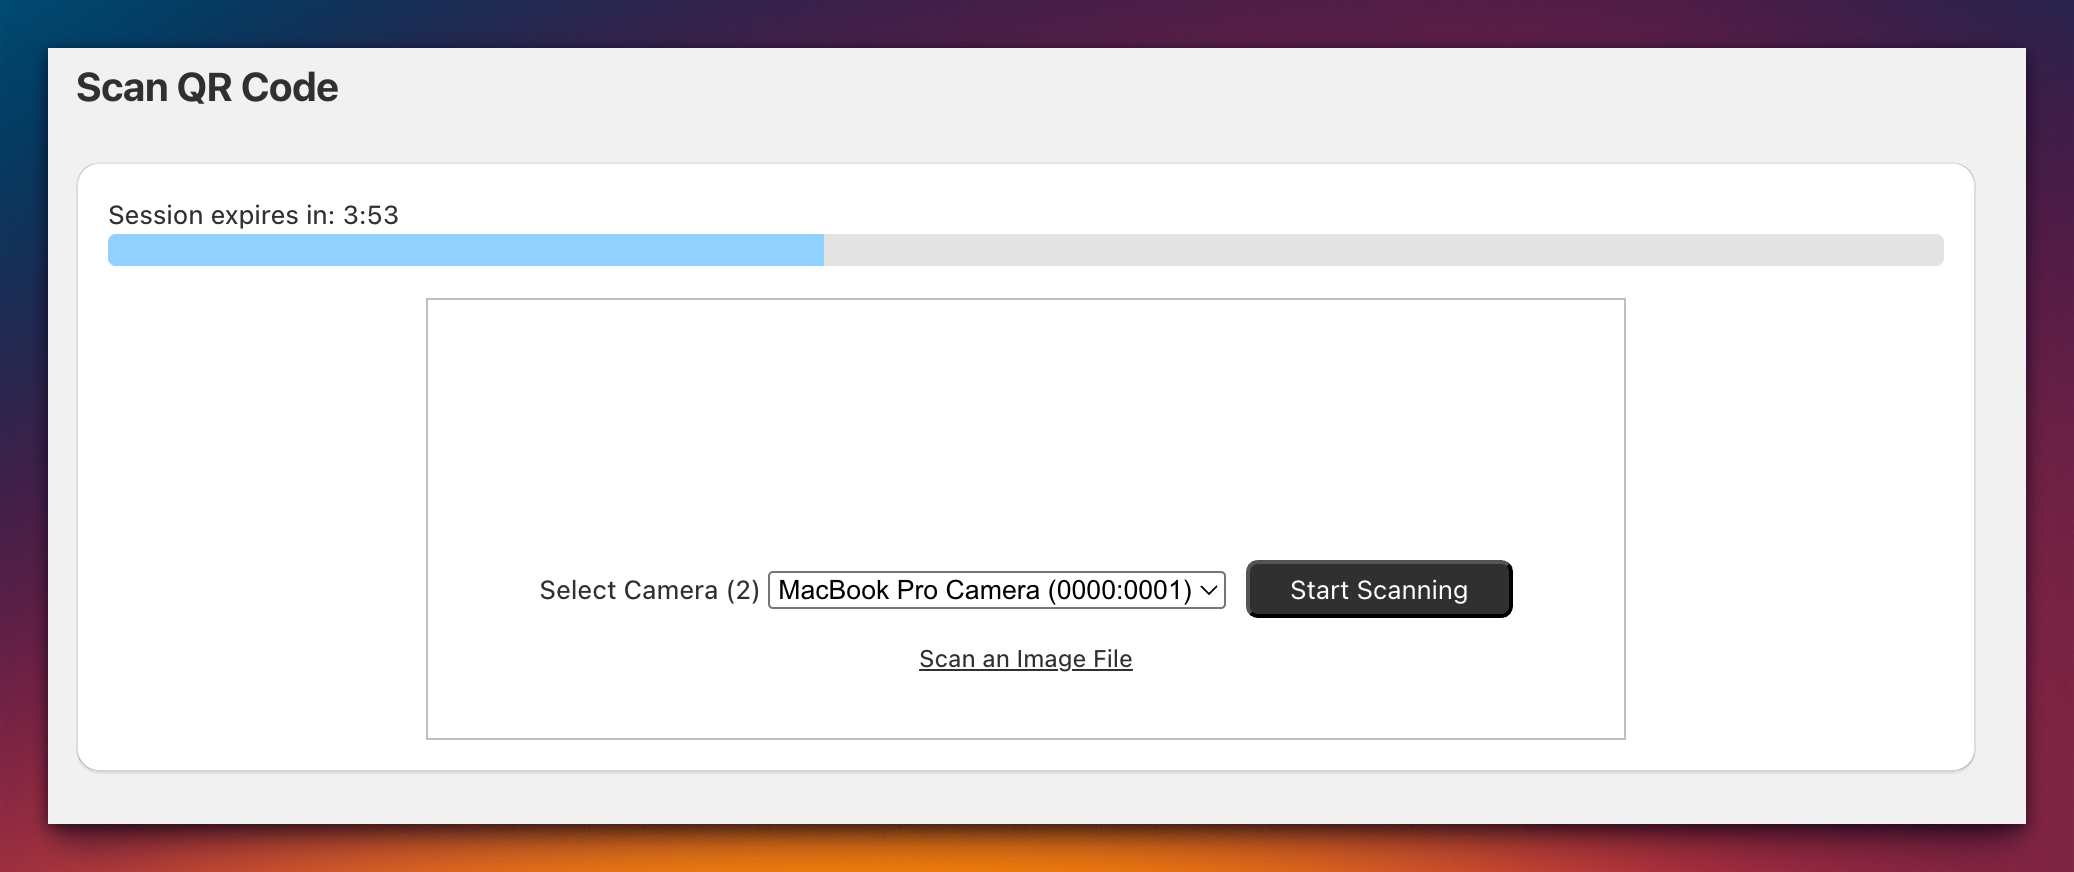
- Click the Scan QR button (opens a new page)
- Session is active for 10 minutes with a progress timer
- Click Request Camera Permissions → Allow
- Press Start Scanning
- Align the QR code in the scanning rectangle
- A success message appears → close the window
- Code info is visible in the App Admin extension block
At the register (Shopify POS)
Staff can activate a card without an online order, from the GiftCard Hero tile in Shopify POS:
- Open the tile and tap Register Gift Card.
- Scan the card's QR code, or type the code.
- Enter the Gift card value and tap Register Gift Card.
The code becomes an active Shopify gift card with that balance. A code that already exists as a gift card is refused, so a card can't be registered twice.
Registering creates the card without taking payment, so make sure the card's value has been paid. If you don't want staff to create cards at the register, turn on Disable gift card registration in Shopify POS app in POS Tools. See POS Integration for the other POS tools.
Pre-loaded: importing codes with a balance
- Go to Bulk actions → Import from file.
- Download the template and fill in one row per card. Only
initial_valueis required; put your printed code in thecodecolumn (leave it empty and GiftCard Hero generates a code). Optional columns:currency_code,expires_on,note,email. - Save the file as a comma-separated CSV and upload it.
Example:
initial_value,code
25,JNPR8K2M4Q7T
50,JNPR3H9W6X1Z
Each row becomes an active Shopify gift card with the balance from the file. Rows that fail (for example a code in the wrong format) are listed with their error in the job results.
See Bulk Operations for the other bulk tools.
Selling physical cards online
List the physical gift card as a product in your store. When it is ordered, the code is assigned automatically from the pool or by you on the order page, and you ship the card.
In the Notifications section of the Physical gift cards tab you can also:
- Send digital copy to purchaser's email: an email with a digital copy of the card and its assigned code
- Send copy of gift card email to specified address: a copy to an address you choose, for example your fulfillment team
Common scenarios
A card code is rejected at checkout
- Was the card sold and assigned? With activate on sale, a printed code is not a gift card until an order or a POS registration activates it. Check the code's status in Uploaded gift codes.
- Was it imported? For pre-loaded cards, check the job results in Bulk actions for a row error.
- Balance, expiry, status. Open the card in Shopify admin → Gift cards: it may be spent, expired or deactivated.
A customer lost their physical card
The code is the card, so it can't be recovered. If the customer knows the code or you can find it on the order:
- Check the remaining balance in Shopify admin → Gift cards
- Deactivate the old card there, so it can't be spent
- Issue a new eGift card for the remaining balance
See also: Managing Physical Gift Card Inventory.
Physical Gift Card Configuration
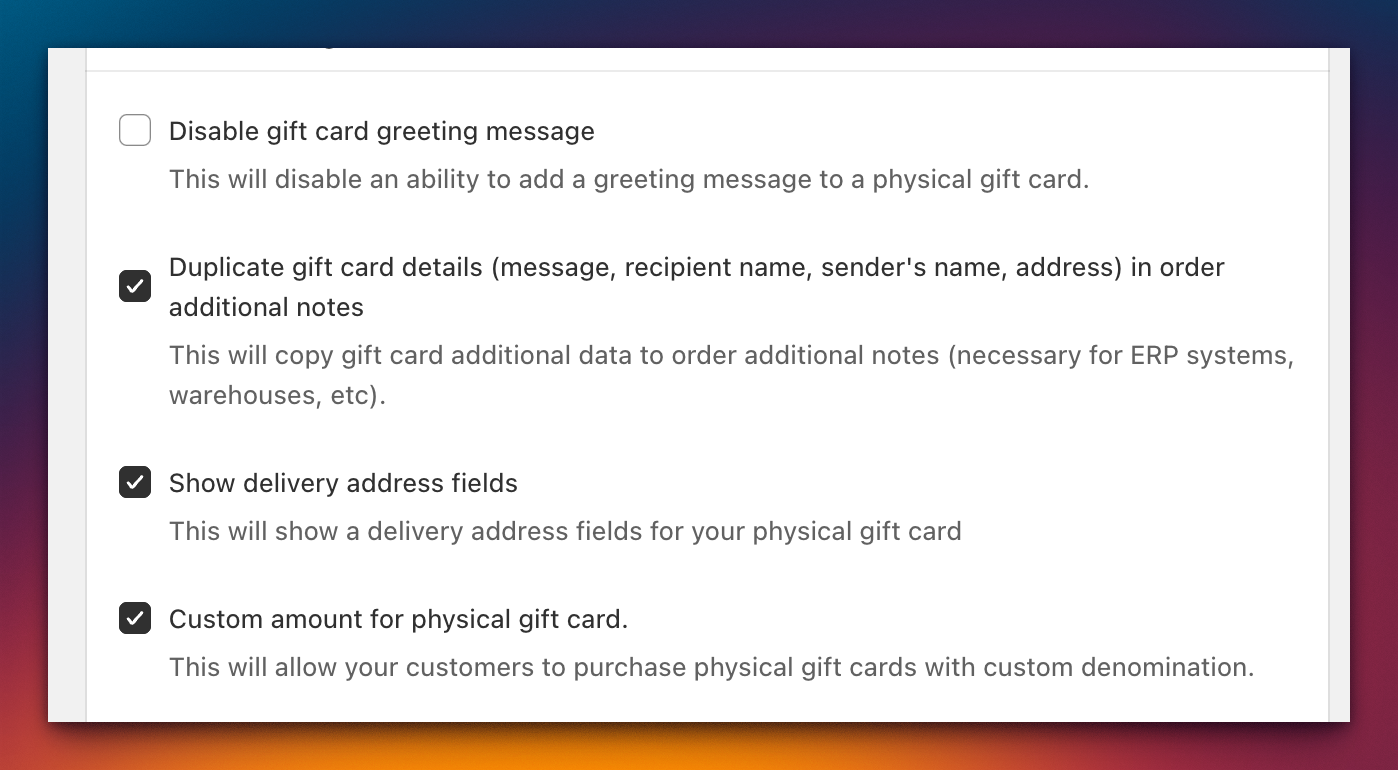
These options are in the Physical gift cards tab, under Purchase options and Order & delivery:
| Setting | Description |
|---|---|
| Disable gift card greeting message | Removes the customer's ability to add messages |
| Duplicate shipping details in order additional notes | Copies the shipping address details to the order notes, for logistics or ERP systems |
| Show delivery address fields | Allows separate shipping address entry |
| Custom amount | Permits customer-defined denominations (with configurable min/max limits, SKU: physical-custom-amount) |
Additional charge
You can add a fixed extra charge to physical gift cards — for example a delivery fee, an envelope or gift-wrapping fee, or a fee for adding a personal gift message. The charge is added automatically in the cart (via a Shopify cart transform) and is shown to the customer in the cart and on checkout.
Find these options under eGift/Physical cards → Physical gift cards tab, in the Additional charge section.
Setting it up
- Enable Add additional charge.
- Choose When to apply:
- Only when the card is personalized — the charge is added when the customer fills in a gift message, a recipient, or a sender. Cards with no personalization are not charged.
- Always for physical gift cards — the charge is added to every physical gift card.
-
Set the Charge amount in your store's primary currency.
For example, if every physical card ships in a gift box that costs €8, choose Always for physical gift cards and enter
8. -
Enter a Charge name for each language your store publishes (see below).
- Save your settings. The first time you enable the charge, GiftCard Hero sets up a hidden fee product and registers the cart transform automatically — this can take a moment.
Translating the charge name
The charge name is visible to customers, so you can translate it into every language your store publishes:
- Pick a language from the Language dropdown.
- Enter the Charge name for that language (for example "Gift wrapping" / "Geschenkverpackung").
The name in your primary language is required. Any language you leave empty falls back to the primary-language name. The translated name appears both in the storefront gift card widget and on the native Shopify checkout.
Notes
- The charge applies to physical gift cards only, not eGift cards, and one charge is added per physical gift card line.
- The amount is set in your store's primary currency.
- If you disable the greeting message for physical cards and use the "Only when personalized" mode, the charge still applies when a recipient or sender is entered. If your cards have no personalization fields at all, switch to Always instead — the app shows a warning when this combination would never charge.