Getting Started with Loyalty
Loyalty rewards your customers with store credit automatically. You build a rule once — for example, "give 5% back on every order" — and Gift Card Hero issues the credit whenever a matching event happens. Customers see their balance in their account, copy a code, and spend it at checkout.
This guide explains what Loyalty does and walks you through your first reward in about 5 minutes.
What Loyalty does
- Issues store credit as a reward. Credit lands in the customer's rewards balance (a wallet held on a gift card behind the scenes). Each customer has one balance, created the first time they're rewarded.
- Runs on workflows. A workflow is a rule made of a trigger ("when this happens") and one or more actions ("do this"). See the Workflow Builder guide.
- Supports tiers. Group customers by lifetime spend and give higher tiers a bigger reward multiplier. See Tiers.
- Lets customers redeem at checkout. They copy their rewards code and enter it like a gift card — credit isn't applied to the cart automatically. See How customers redeem rewards.
- Can message customers. A workflow can email, text, or send a Klaviyo event when a reward lands. See Send a message.
Nothing to install
Loyalty is built into Gift Card Hero. There's no separate app to add. Rewards use your existing gift card system, so credit works online and in Shopify POS just like any gift card balance.
Don't see Loyalty?
Loyalty is switched on per store. If the Loyalty & Rewards card below isn't on your app home, it isn't enabled for your store yet — use Need help? Contact us in the app to ask about it.
Step 1 — Open Loyalty
From the Gift Card Hero home page, find the Loyalty & Rewards card and click Open loyalty.
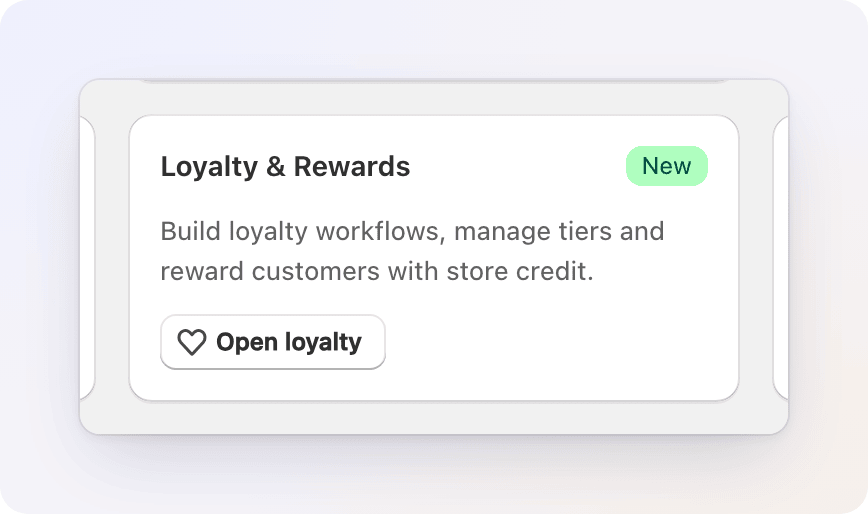
This opens the Loyalty Dashboard, your home base for the program.
Step 2 — Get to know the dashboard
The dashboard shows how your program is performing and links to everything you'll manage.
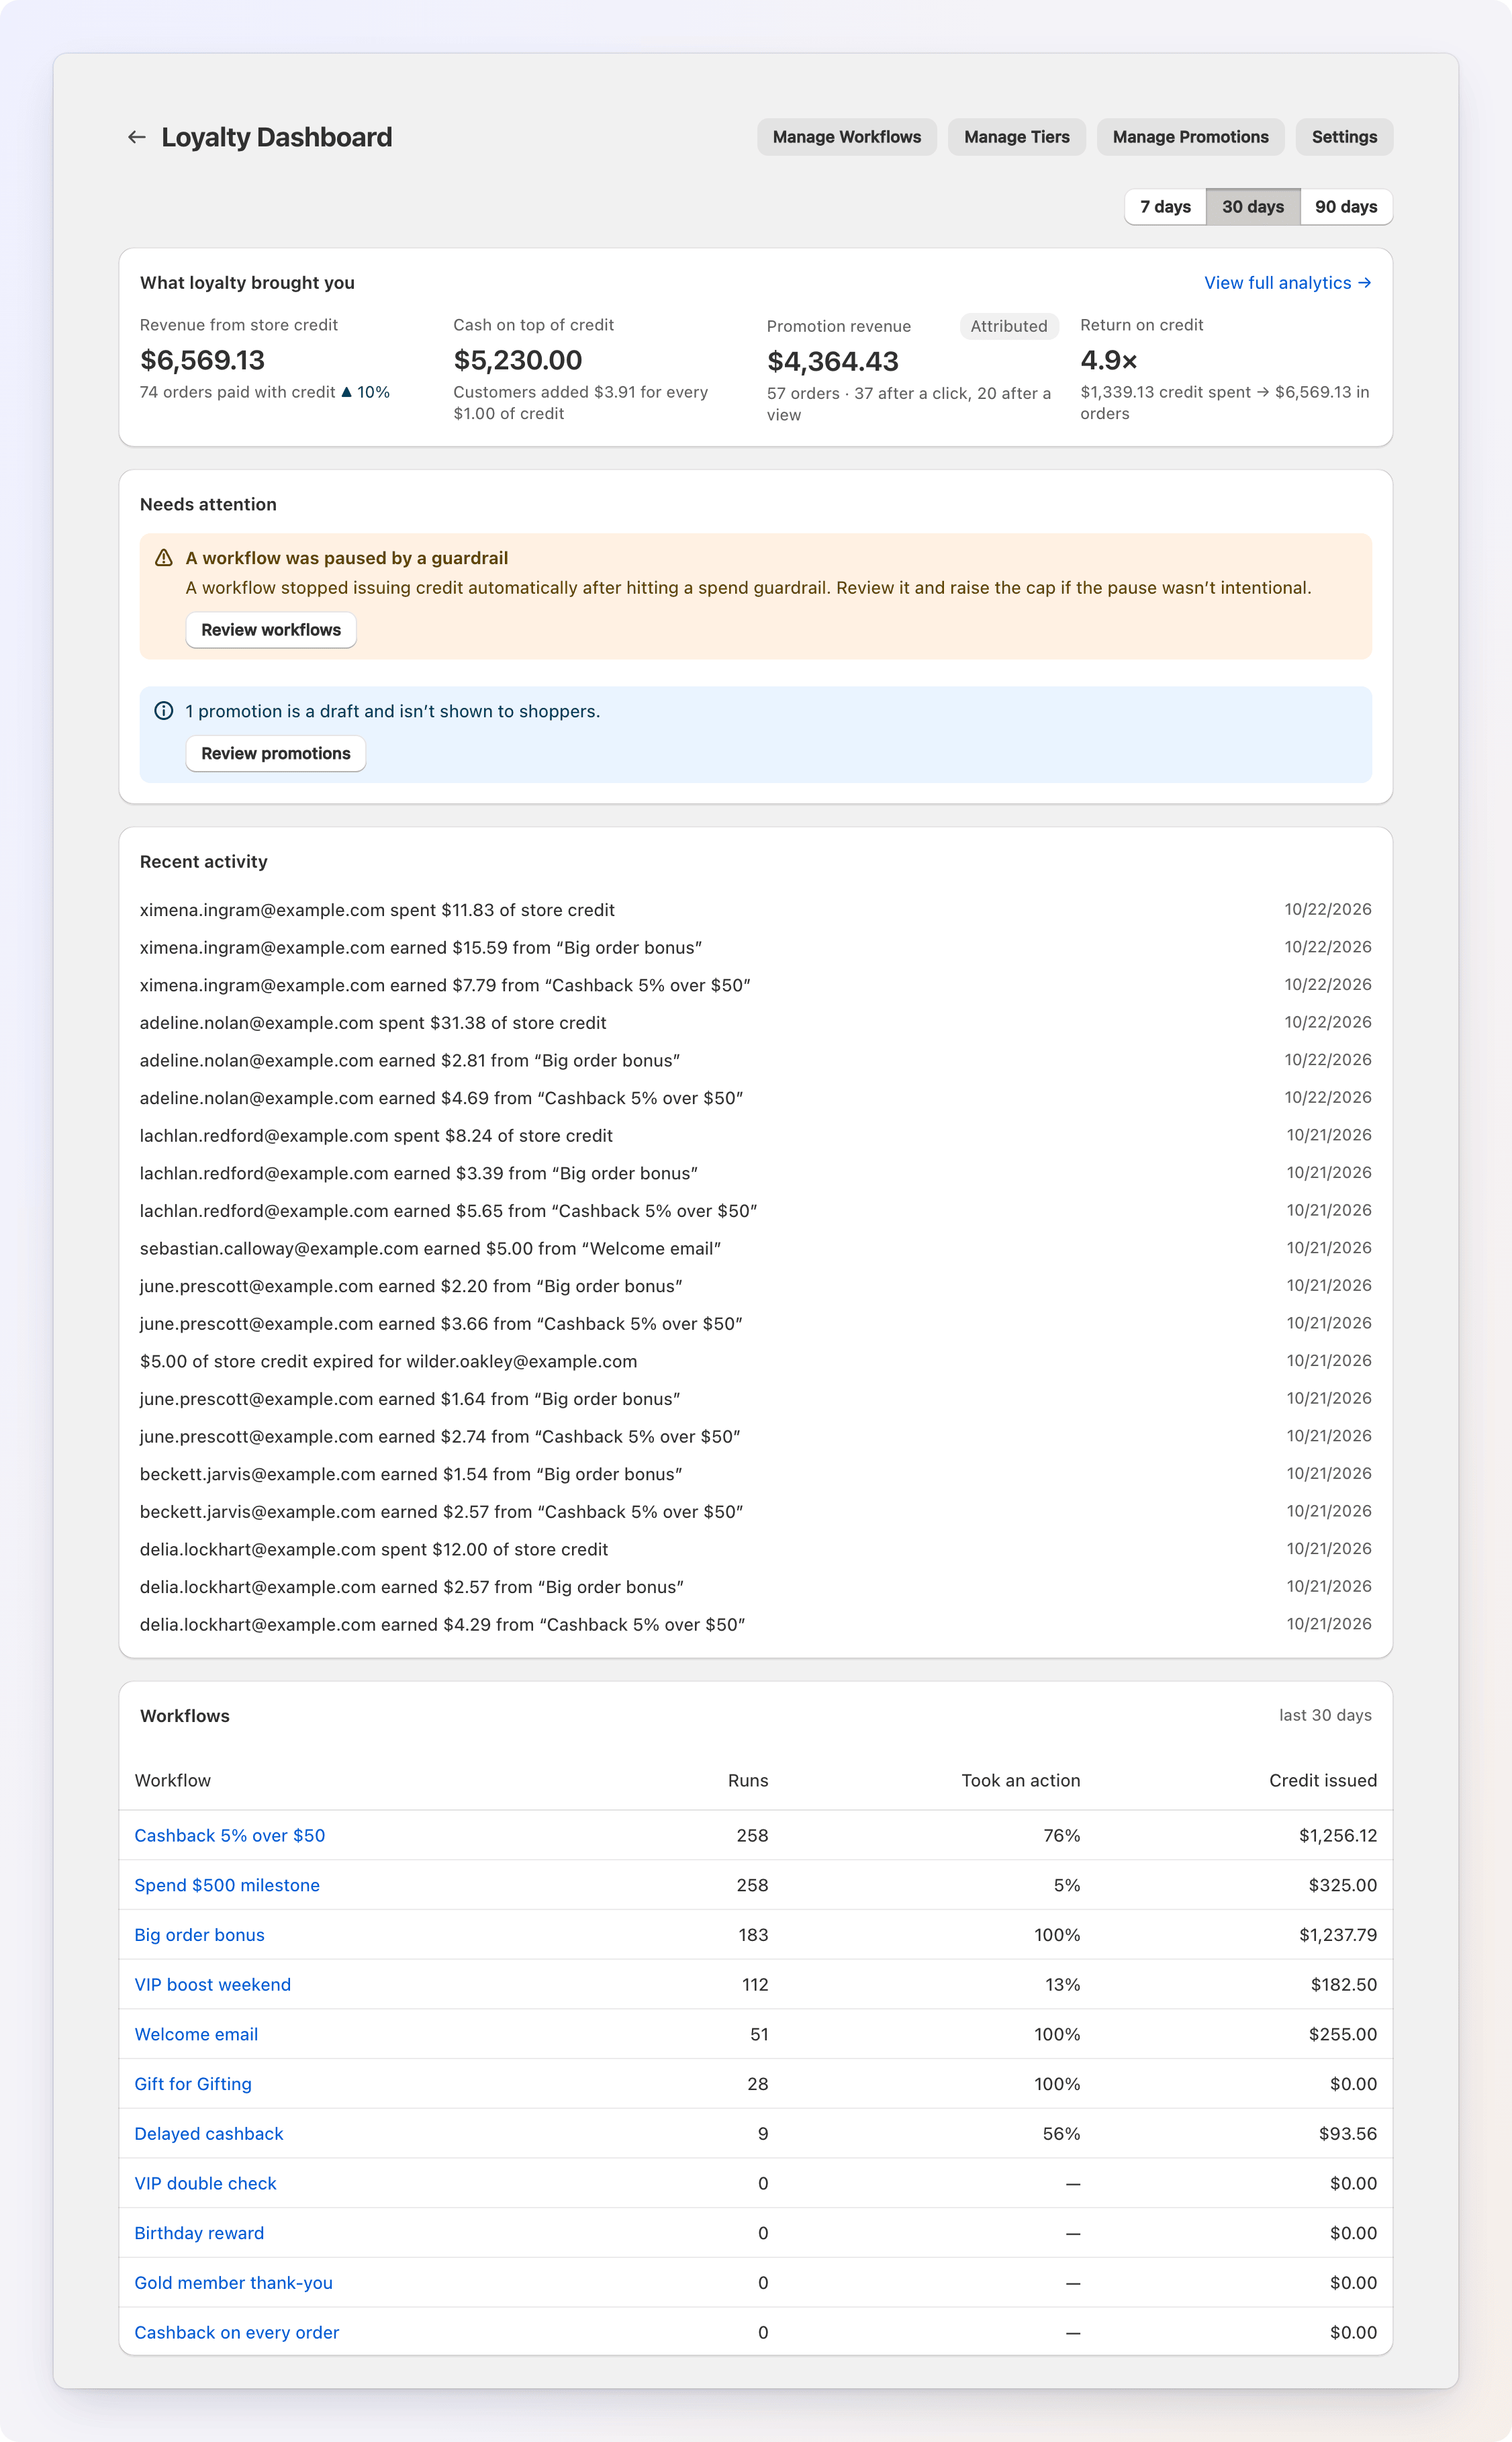
From the top of the page, Manage Workflows, Manage Tiers, Manage Promotions, and Settings take you to the rest of the program. Use the 7 days / 30 days / 90 days buttons to change the period the numbers cover (30 days by default).
| Section | What it shows |
|---|---|
| What loyalty brought you | Revenue from orders paid with store credit, the cash customers added on top of their credit, and the return on the credit spent. A promotion tile appears once you've run a promotion. View full analytics → opens the Loyalty analytics tab. |
| Needs attention | A warning if a workflow was paused by a spending limit, a count of promotions still in draft, and a short setup checklist — Tiers configured, First workflow active, Promotion published. |
| Recent activity | The latest rewards, redemptions, expirations, refund clawbacks and manual adjustments, in plain sentences. |
| Workflows | Each workflow's runs, how many took an action, and credit issued in the period. |
Until you have an active workflow, a Get started with loyalty banner walks you through the next steps; dismiss it once you don't need it.
Step 3 — Build your first workflow
Let's create a simple "5% cashback on every order" reward.
- On the dashboard, click Manage Workflows, then click Create Workflow.
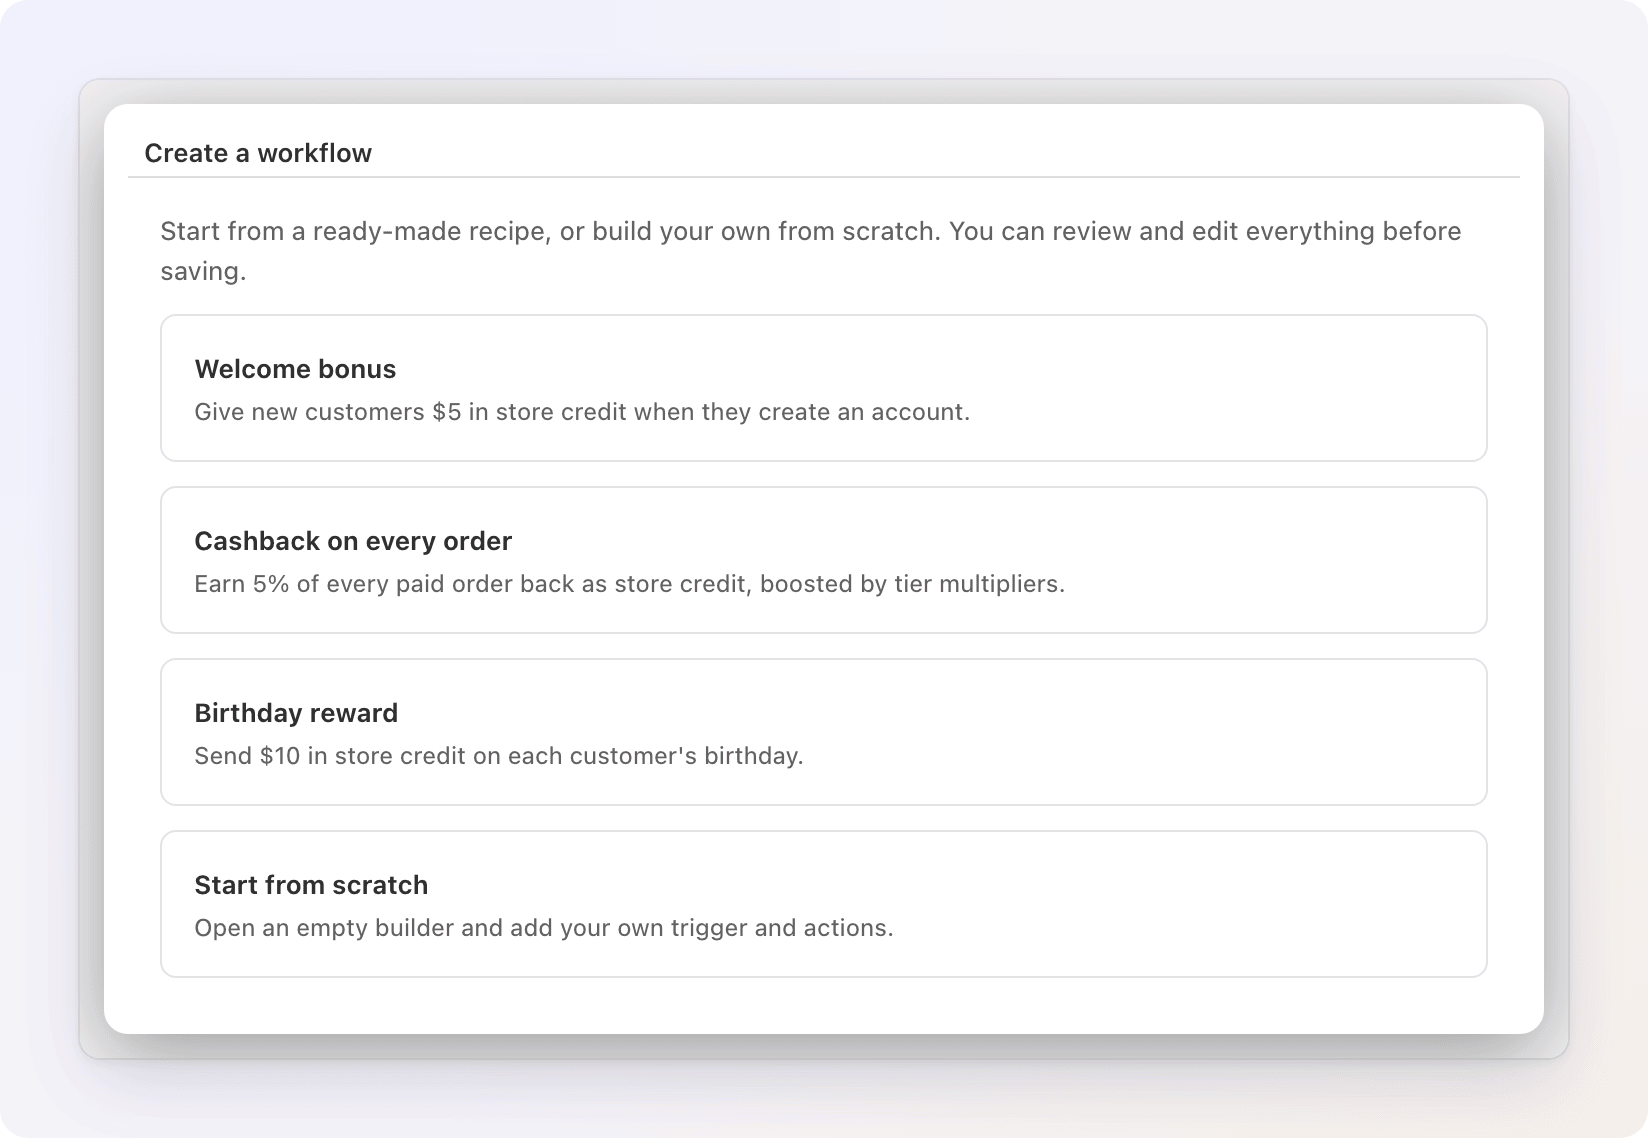
- Pick Cashback on every order from the list of recipes. (The others are Welcome bonus — $5 when someone creates an account — and Birthday reward — $10 on a customer's birthday. Start from scratch opens an empty builder.)
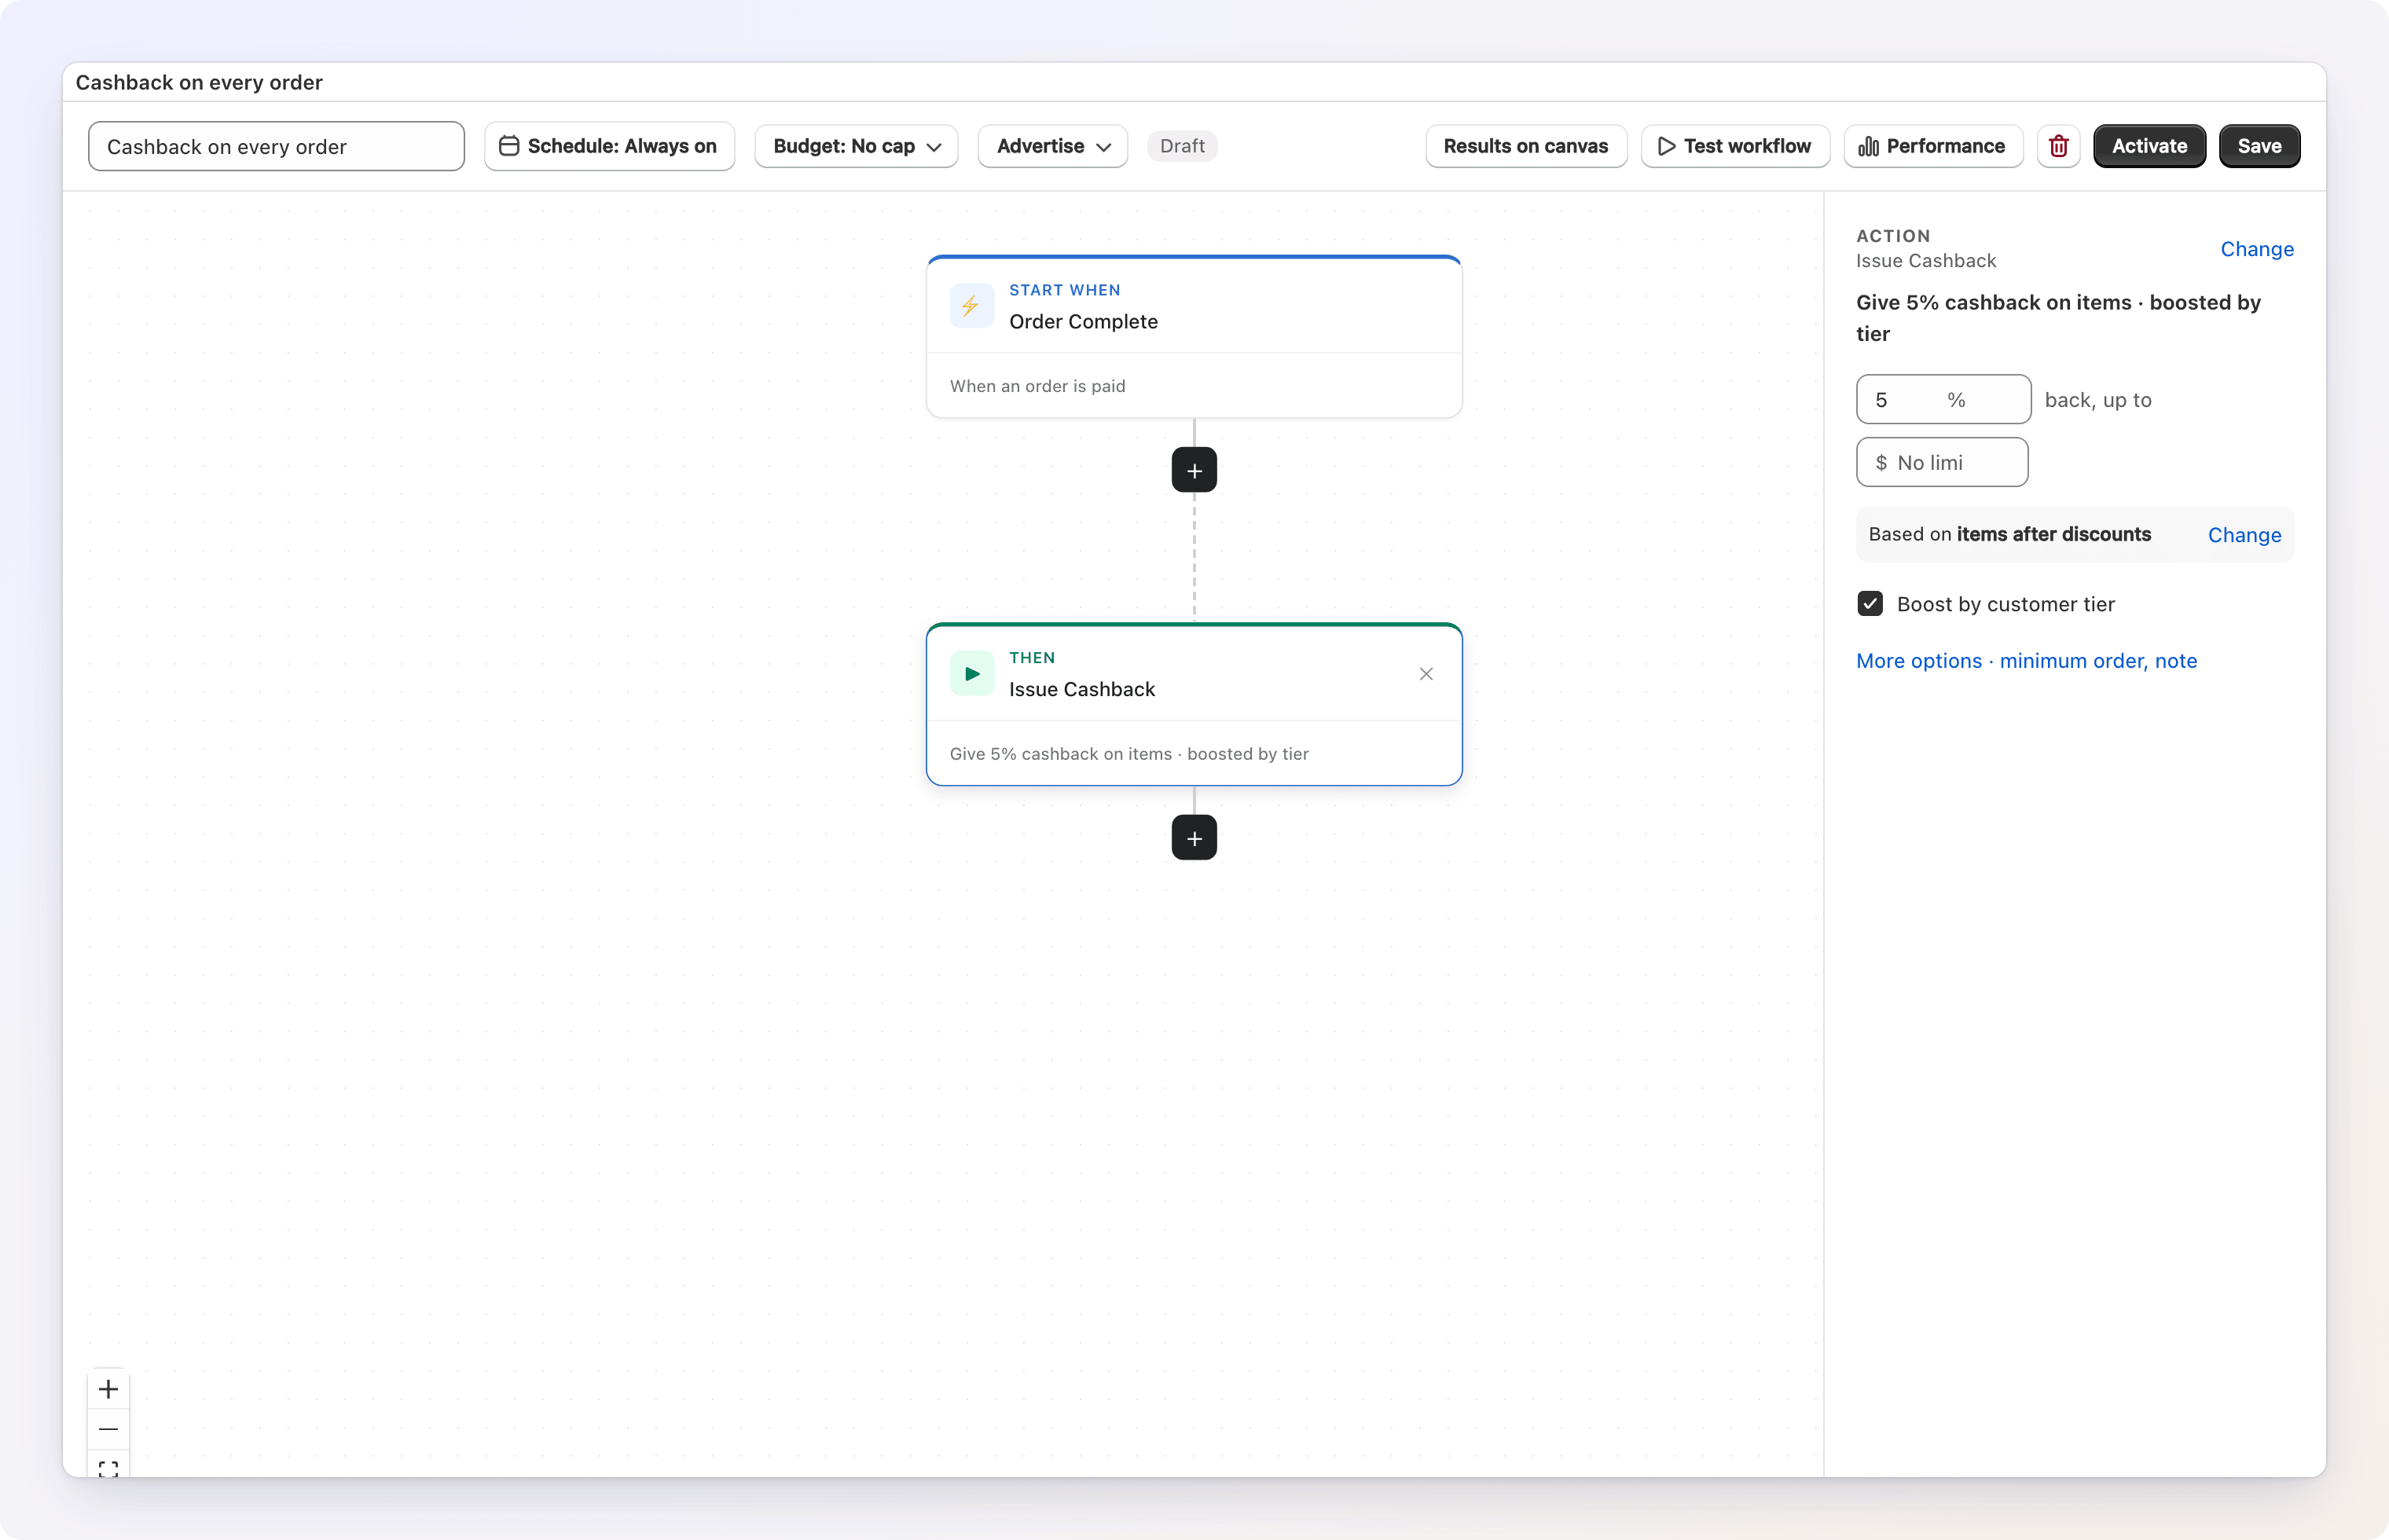
- The builder opens with the trigger and action already in place: an Order Complete trigger (fires whenever an order is paid) followed by Issue Cashback at 5%. At the top, rename the workflow if you like.
- Click the Issue Cashback card to see its settings on the right. Change the percentage if you want a different rate.
- Click Save. The workflow is saved as a Draft — it isn't running yet.
Prefer a fixed welcome reward?
Swap the action for Issue Credit with a fixed amount (for example, $5) and add a First Order condition so only first-time buyers get it. The Workflow Builder guide covers every trigger, condition, and action.
Step 4 — Test it, then turn it on
Before going live, simulate the workflow so you know exactly what a customer would receive. Test workflow appears in the toolbar once the workflow has been saved.
- Click Test workflow.
- Leave New customer selected to test a first-time shopper, or choose Existing customer and enter their email to use their real tier and spend. Enter a sample order Subtotal.
- Click Run test in the dialog's title bar.
- Review the result: each step with what it would do, and the green box at the bottom with the credit the customer would receive. No real credit is issued and no message is sent.
- When you're happy, close the dialog and click Activate. The status badge changes to Active and the workflow starts running on live orders.
See Test workflow (dry-run) for the full testing walkthrough.
Guest checkouts don't earn
Rewards go to a customer, so an order placed without a customer account doesn't run any workflow.
Step 5 — Show the rewards section to customers
So customers can see and spend their rewards, make sure the customer-facing rewards section is switched on.
- Go back to the Loyalty Dashboard and click Settings.
- Confirm Show the rewards section in the customer account is checked. It is by default.
- Save if you changed anything (a save bar appears at the top).
Now customers earning credit can view their balance and copy their redemption code. Turning this off hides the rewards section without stopping customers from earning.
While you're in Loyalty Settings (Loyalty dashboard → Settings), take a moment for Automatically claw back loyalty credit on refunds (on by default — a refund takes back the matching share of the credit it earned) and the Guardrails that cap how much credit can be issued. See the Money FAQ. See How customers redeem rewards.
Advertise it on your storefront
Once a workflow is live, shoppers who haven't earned yet won't know about it unless you tell them. Open the workflow, click Advertise in the toolbar (it works once the workflow is saved), and create a promotion — Gift Card Hero shows it as a pop-up nudge card and/or a banner on your storefront, with the reward numbers always pulled live from the workflow. See The Promotions widget.
What happens next
- When a matching order comes in, the workflow issues the reward automatically.
- The customer sees the new balance in their account's Rewards tab.
- They copy their code and enter it at checkout to spend it.
Next steps
- Build more advanced workflows with conditions and multiple actions
- Set up tiers to reward your best customers with a bigger multiplier
- See how customers redeem rewards
- Understand refunds, expiration, and spending limits
- Advertise a reward on your storefront with a nudge card or banner
- See what loyalty brings you in the analytics